

You are trying to print documents and images on your Samsung Tablet but not finding an easy way to do it? This article shows you six ways in which you can print from your Samsung tablet. If you are not familiar with them, then keep reading.
It is common for individuals to fail to exploit the Samsung Tablet’s printing capabilities fully. They give up altogether when the wireless printing setup fails and start scouring the internet for another wired or wireless solution when the first fails.
Regarding wireless printing capabilities, Samsung is far more generous than most tablet manufacturers, allowing you to use Bluetooth, proprietary software, and even several compatible applications. By taking advantage of these options, you can get prints without losing sleep over them.
We will discuss the Samsung Tablet’s best printing options in the subsequent sections, using step-by-step guides.
Table of Contents
Few Comparison of Different Methods:-
The process of printing from your Samsung Tablet is less complicated than you think it is. There are several methods to choose from:-
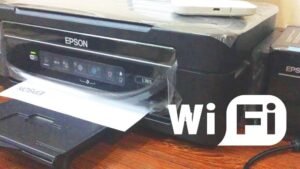
Configuring WiFi Printing
Connecting a printer to a home or office network via a wireless network is probably the most common way to start. It is, however, not possible to obtain the prints without first accessing the resources already available on the tablet.
Additionally, you need to configure the wireless printer according to your network. Not only that, but if you intend to use the Android OS associated with the tablet for interfacing directly with the printer, you will need to employ ironclad configuration strategies.
Step 1: Setting up the printer
Place the printer near the wireless router when setting it up. Providing your tablet has LTE support, you can even connect it to your mobile network.
Thanks to the integrated wireless capabilities found in most modern printing solutions, they are readily connected to WiFi networks. As displayed on the menu system, the connection name can be easily tapped upon once the printer is switched on.
To set up an automatic connection, you may also set up the router WPS first, followed by the printer WPS.
If your dated printer doesn’t have a visual panel, you can configure the same through the computer.
Step 2: Configuring the tablet
As soon as you have configured the printer, you will turn it on as per your preferences. For this method to work, you must also connect the Samsung Tablet to the same wireless network.
To begin, go to the tablet’s app drawer and select the ‘Settings tab. The first step is to enable the tablet’s WiFi option. The connection that adheres to your router should be selected from the list of connections.
Step 3: Installing the Plugin
Next, you have to select the ‘Printing’ option from the list under the ‘More Connections’ tab in the settings tab. You will see a default printing option when you click on the Printing tab, as well as an option to download a plugin.
By visiting the Google Play store directly, you’ll be able to download the tablet plugin for the relevant printer. For those who cannot find the desired plugin, install the one that reads ‘Samsung Print Service.’
Step 4: Adding and Connecting the Printer
As soon as the plugin is added, you must go to the printing menu and click on the desired manufacturer’s plugin to add the printer. Choosing the installed plugin allows you to select the printer that needs to be connected.
When taking advantage of the wireless network, it is best to pair the printer via the IP address. In most cases, the IP address is automatically detected, making pairing easier than ever before.
Step 5: Printing
When paired with the tablet with the printer, you must navigate to the image or document you wish to print. To print the document, click on the right-adhering menu and then tap Print. When you click, you’re prompted to select a printer, confirm the size and orientation, and click the yellow icon to proceed.
Configuring Bluetooth printing
Using the Bluetooth functionality on your Samsung tablet is another option if you’re not interested in getting a router, wireless printer, or a home-based internet connection.

Step 1: Enabling Bluetooth
It seems obvious. It would help if you started by checking the Bluetooth setting on the tablet by going to the home screen and selecting the notification panel.
The tablet begins scanning for nearby gadgets as soon as you turn on Bluetooth. To get the printer to pick up the tablet, you need to make it visible.
Step 2: Pairing the Printer
Select Bluetooth pairing mode on the printer and turn it on. Wait for it to pair with the tablet, and then select the passkey on the tablet if you are instructed to do so.
After the printer is connected to the tablet, launch the concerned file and select Share from the menu. Select the Bluetooth icon from the list of options and select the available device, one of which must be the printer.
Step 3: Printing
You can then send the image or document to the printer by selecting the printer tab. Usually, it automatically prints the image or document. Certain printers, however, may require you to access the screen and confirm the printing and thus display a preview tab.
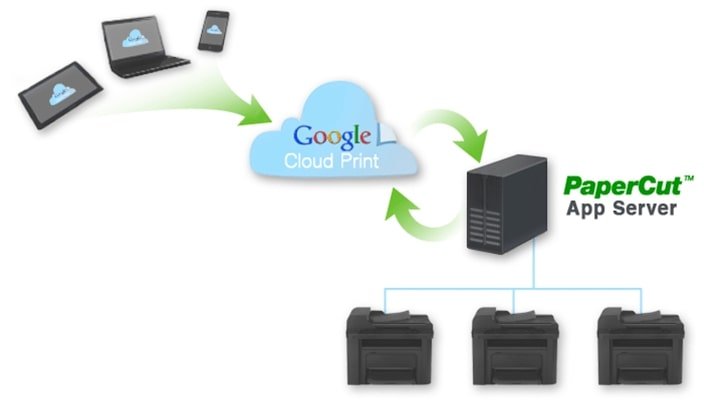
Printing from the Google Cloud
Even though Google Cloud Print was discontinued just a few months ago, it is still important to take a walk down memory lane if it returns. The service also allows you to print any document on the home computer, even if you are not physically present.
Step 1: Browse and upload the files.
To access the interface and upload files onto android devices like the Samsung tablet, you can install apps like Fiabee, Google Cloud Print, or Mobile Print.
In this case, the files would be dropped into a cloud drive that is in sync with your printer at home or work.
Step 2: Ensure you have the desktop app readily available
The Google Cloud Print desktop client must be installed on your computer and synced with your printer for this process to work. As soon as you drop a file into the Cloud Print interface, the printer will pick it up and print it the same way.
Printing with Samsung Tap and Print
Tap and Print is an excellent resource for those who want to reduce the clutter associated with wireless and Bluetooth setups.
In addition, you can print your documents directly from your Samsung tablet, which is one of the easiest ways.
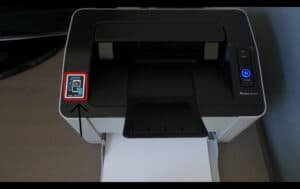
Step 1: Obtain the desired printer.
NFC-compatible printers are needed to take advantage of this functionality. Once you have the desired printer, you won’t need to resort to multiple workarounds to get the prints..
Step 2: Print the documents
It is first necessary to turn on the NFC and tablet.

Following activation of the NFC printer or direct WiFi functionality of the printer, the portable device can be placed on top of the printer, and printing will begin. This process requires you first to install the Samsung Mobile Print application.

You can do this in just a few steps. The documents can also be scanned and saved to the tablet for future use.
Tap and Print establishes a direct wireless connection between your tablet and your printer, reducing clutter in the process.
Direct printing
You can also take a print directly from Samsung’s new devices, provided that you have a printer attached to the tablet. As part of this process, an OTG cable is also used to establish a direct connection between the tablet and the printer.
Prerequisite: Make sure the Specifications are set correctly
Ensure you have a compatible printer and a tablet running Android 4.0 or a higher version of the OS on hand before starting. In addition, the Tablet must be equipped with the printer plugin to facilitate seamless interactions.

Step 1: Use OTG to connect your tablet and printer
Using a USB cable, connect one end to the port on the printer. An OTG cable, which latches onto the tablet, connects the USB cable provided with the printer to the OTG cable.
Step 2: Agreeing to default option pop-up
After you connect, a pop-up will appear asking you to choose the printer as your default action. Select it and click OK.
Step 3: Printing
After completing the setup, head over to the image or document, you would like to print. Moreover, click on the ‘Print’ option to the right of the arrow. You must select your preferred USB printer and tap OK when you see the preview screen.
Printing from Applications
Furthermore, you can even connect Samsung printers to tablets for printing solely by using the Samsung Mobile Print app.
Step 1: You need to download the mobile app onto the tablet.
Step 2: Let the app automatically detect the printers that are compatible with it.
Printing is made seamless by establishing direct connections between the table and the printer.
Using Mopria App
However, the device must support Internet printing protocol if the Mopria app is installed on the tablet. The following are the steps for preparing the printer to respond to Mopria.
Prerequisite: Connect the wireless printer to the network
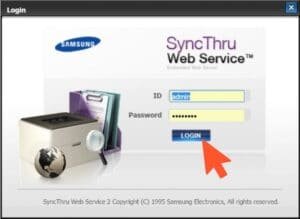
Step 1: Enter the machine’s IP address on the tablet’s web browser while it is connected to the internet. Printers often generate their IP addresses automatically.

Step 2: The SyncThru interface will open after you type in the IP address. Log in to the interface with the standard default credentials, which are admin and sec00000, respectively.
Step 3: You can enable IPP in the Network settings after joining the SyncThru service.

Step 4: Allow your printer to connect to your computer directly using Multicast DNS, so it does not have to be disturbed by nearby devices. The printing process becomes considerably faster.

Step 5: Within the SyncThru system, go to the Security tab and select Mopria as the preferred service.

With Samsung tablets already supporting IPP and mDNS backhaul, you need to install the app, then select the Mopria print service under the Print Services section. Depending on the type of printer you are using, you might need to adjust the print options for the final prints.
Conclusion
The two strategies mentioned above are equally effective when printing from a Samsung Tablet. Choosing a printer depends on several factors, including printer compatibility, OS version, ease of printing, technical skills, familiarity with IPP protocols, portability, remote printing, and more.
Whatever choice you make, you must use a high-quality color printer to get the most out of Samsung’s new tablets.

Ben Scott is a prominent technology journalist and reviewer, specializing in tablet devices. He is known for his comprehensive and unbiased reviews of tablets from various manufacturers.
With a deep understanding of tablet technology, including hardware components, operating systems, and software applications, Scott provides clear and informative reviews accessible to readers of all levels of technical expertise.
His attention to detail and in-depth analysis have earned him a loyal following of readers.